Shockwave Parts
Cane Creek DB CS Coil Rebuild Kit | Full DIY Shock Service
Cane Creek DB CS Coil Rebuild Kit | Full DIY Shock Service
Couldn't load pickup availability
Cane Creek DB CS Coil – Full DIY Rebuild Toolkit
Everything you need to fully rebuild your Cane Creek DB CS Coil rear shock at home. This version is simpler than DB Inline Air / Coil: no bladder, no pellet retainer, and a more forgiving bleed layout.
What’s Included
- 8 mm + 9.5 mm Dual Shaft Clamp – Covers all shaft revisions, including post-2018 updates and retrofitted older shocks
- Graduated IFP Depth Tool – For accurate IFP positioning
- M4 IFP Puller – For removing the IFP Cap and IFP
What You’ll Need (Not Included)
- Park Tool SPA-2 Pin Wrench – Fits the damper body holes well enough (2.4 mm pins, low torque)
- Shock pump + needle fill tool – See needle air fill procedure
- Basic brake bleed kit – Used for damper bleeding (port is shallow, easier than DB Air)
IFP Setup Notes
- Bottom the IFP in the piggyback and measure full depth
- Set IFP depth to full depth minus 5 mm
- Fully open all adjusters before bleeding
This shock does not use a pellet retainer.
Notes on Setup & Bleeding
Typical IFP pressure is around 160 psi. A needle air fill tool is required.
Refer to the Essential Tools page and other important tools.
All adjusters must be fully open before bleeding or setting the IFP.
Bleeding Process (Read Carefully)
This is the most important section.
This is a twin-tube damper with no bladder. The official Cane Creek manual assumes a vacuum machine. What follows is a proven home-mechanic bleeding method.
The bleed screw near the eyelet must remain closed at first.
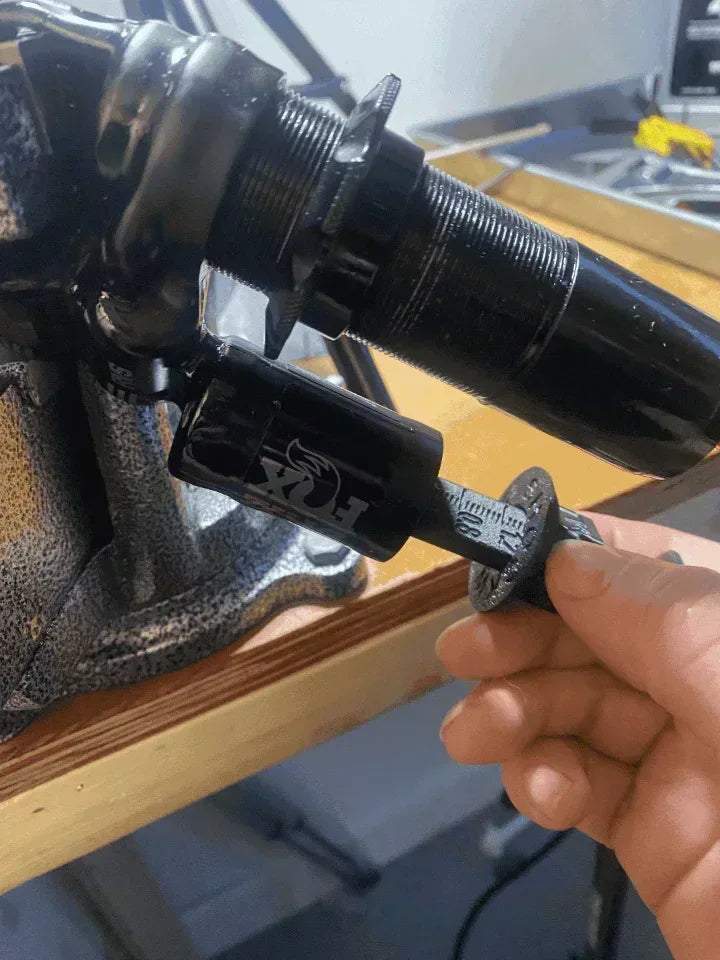
- Use the rubber glove technique with the shock vertical in a vise (same principle as shown in the Fox Float X2 2016–2018)
- Alternate pressure on damper body and piggyback for 20–30 minutes
- Move the IFP in and out slightly with the M4 tool to purge air (do not go too deep or you may pull air back in)
- Fill piggyback to the top and insert the IFP 1–2 cm only
- Fill damper body completely, skim bubbles, install piston / eyelet without trapping air
- Torque sealhead to ~15 Nm (snug, not tight)
- Push the shaft in 1–2 cm max to move trapped air toward the IFP bleed
- Close the IFP bleed screw
- Extend the shaft fully
- Rotate shock so the eyelet bleed screw is the highest point (see orientation reference)
- Open eyelet bleed screw and set IFP to final depth
- Close bleed screw
- Pressurize using the needle fill tool
When done correctly, the shock should cycle almost silently and return at a controlled speed.
Important Notes & Disclaimers
- Always depressurize fully before starting
- Do not confuse with bladder-type shocks
- This shock uses an outer-threaded twin tube (Fox-style)
- All included tools have dedicated manuals
- If you own a Park Tool SPA-2, a dedicated sealhead socket is not mandatory (torque is low)
Not Required for This Shock
- No pellet retainer tool
- No bladder or bladder wrench
- No proprietary bleed fittings if hand bleed is done correctly
Extra Resources
These are advanced procedures. By purchasing or using this kit, you acknowledge all risks and agree to our Terms of Service.
Share