Skip to product information
1 of 6

Shockwave Parts

MTB Fork SAG Tool Quick & Accurate Suspension Setup

MTB Fork SAG Tool Quick & Accurate Suspension Setup

Regular price $17.49 CAD
Regular price Sale price $17.49 CAD
Sale Sold out sorry :(
Shipping calculated at checkout.
How much front travel my bike has?
Which Plastic do you want?
Line Side

MTB FORK SAG Tool - Quick and Accurate Front Suspension Setup

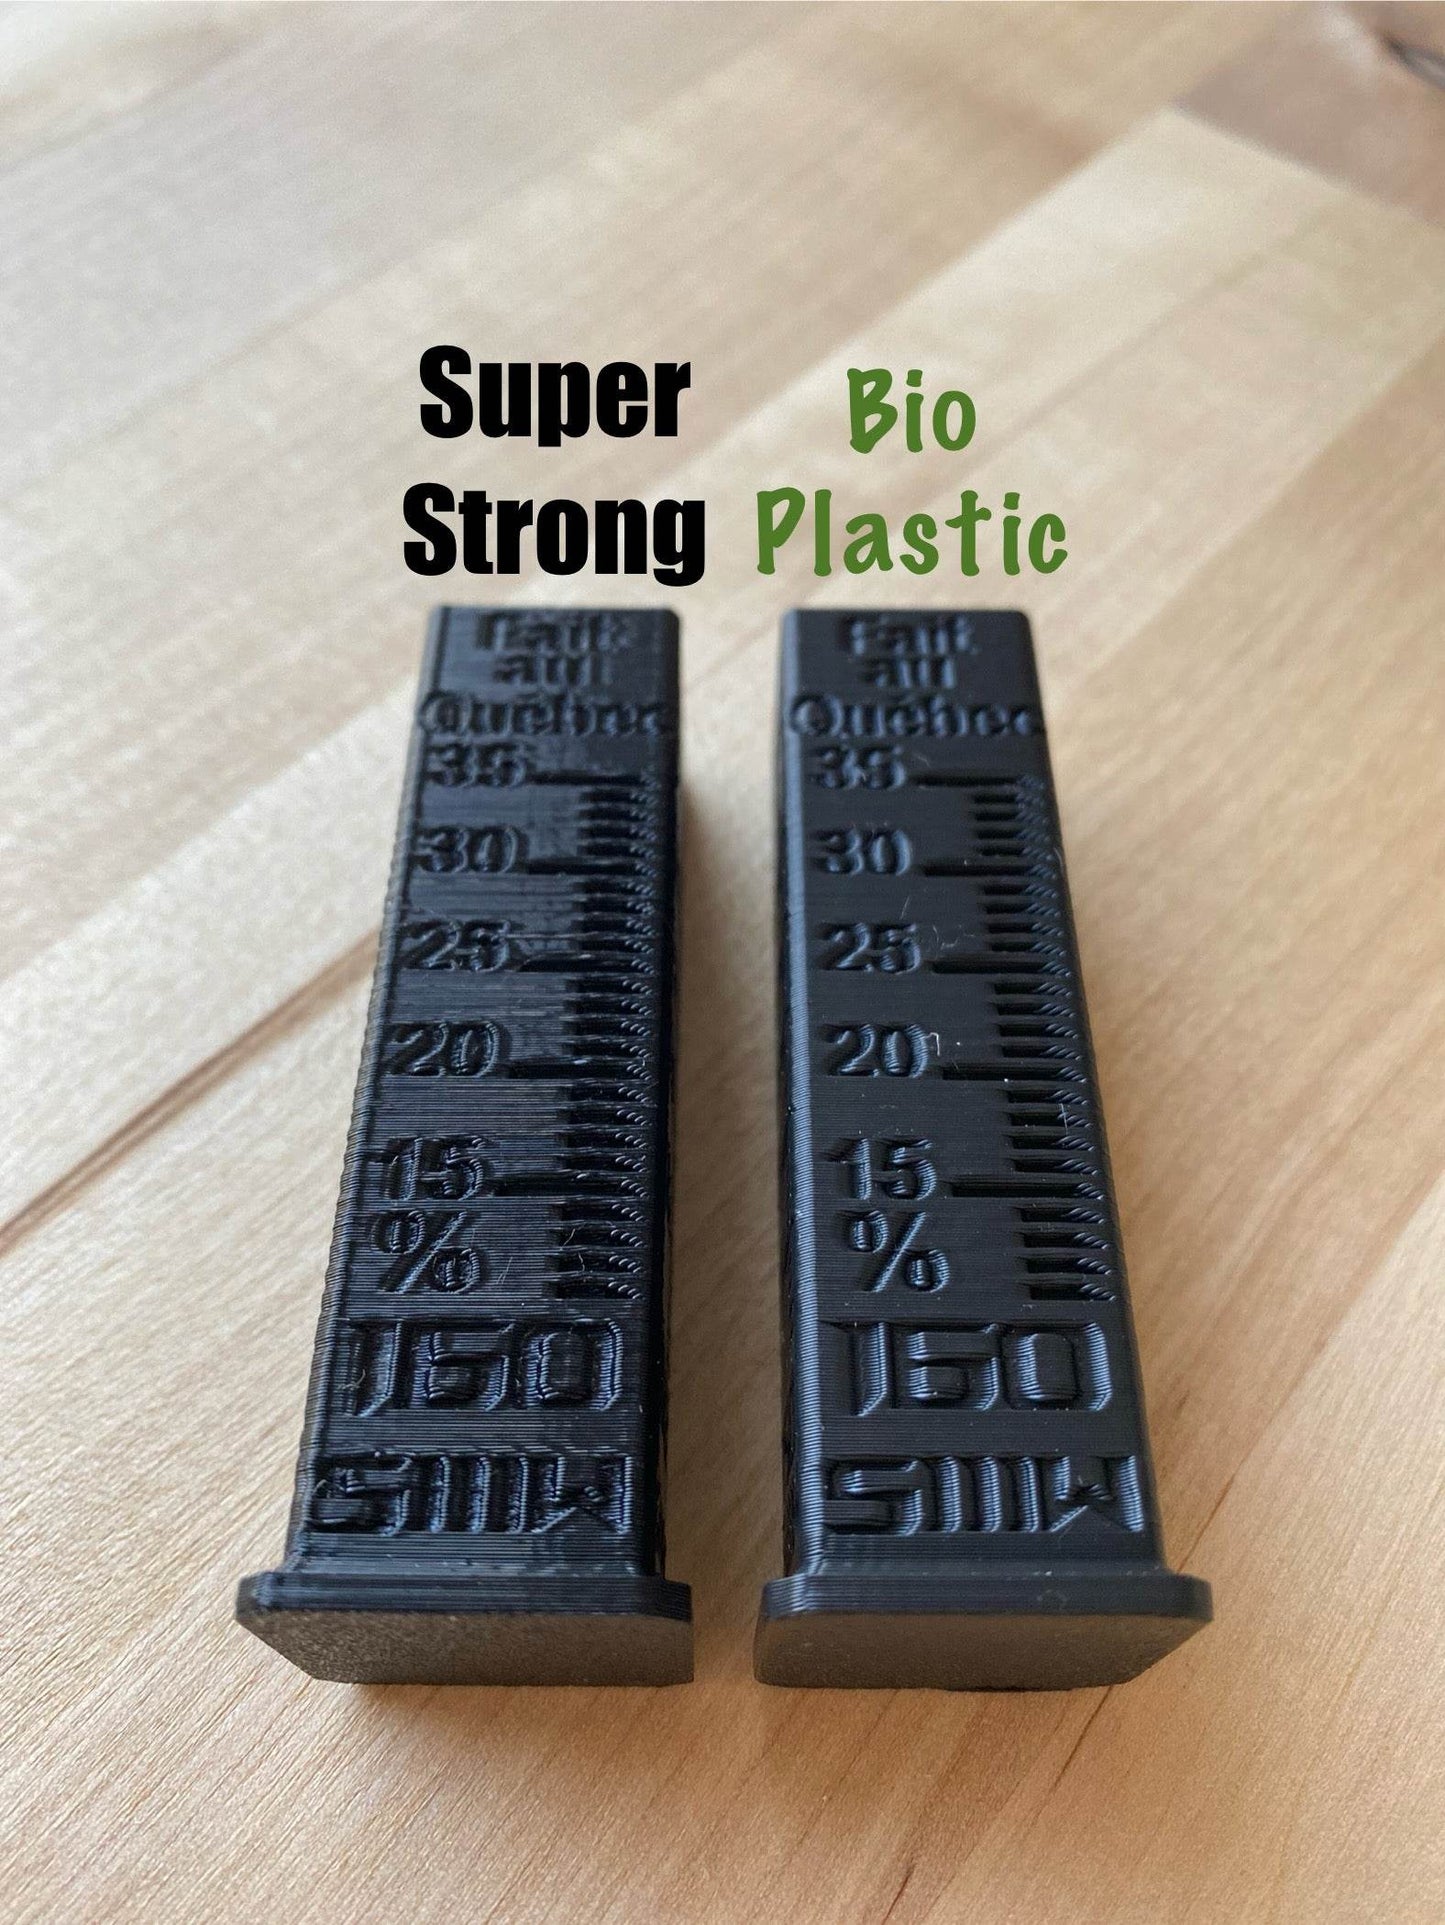
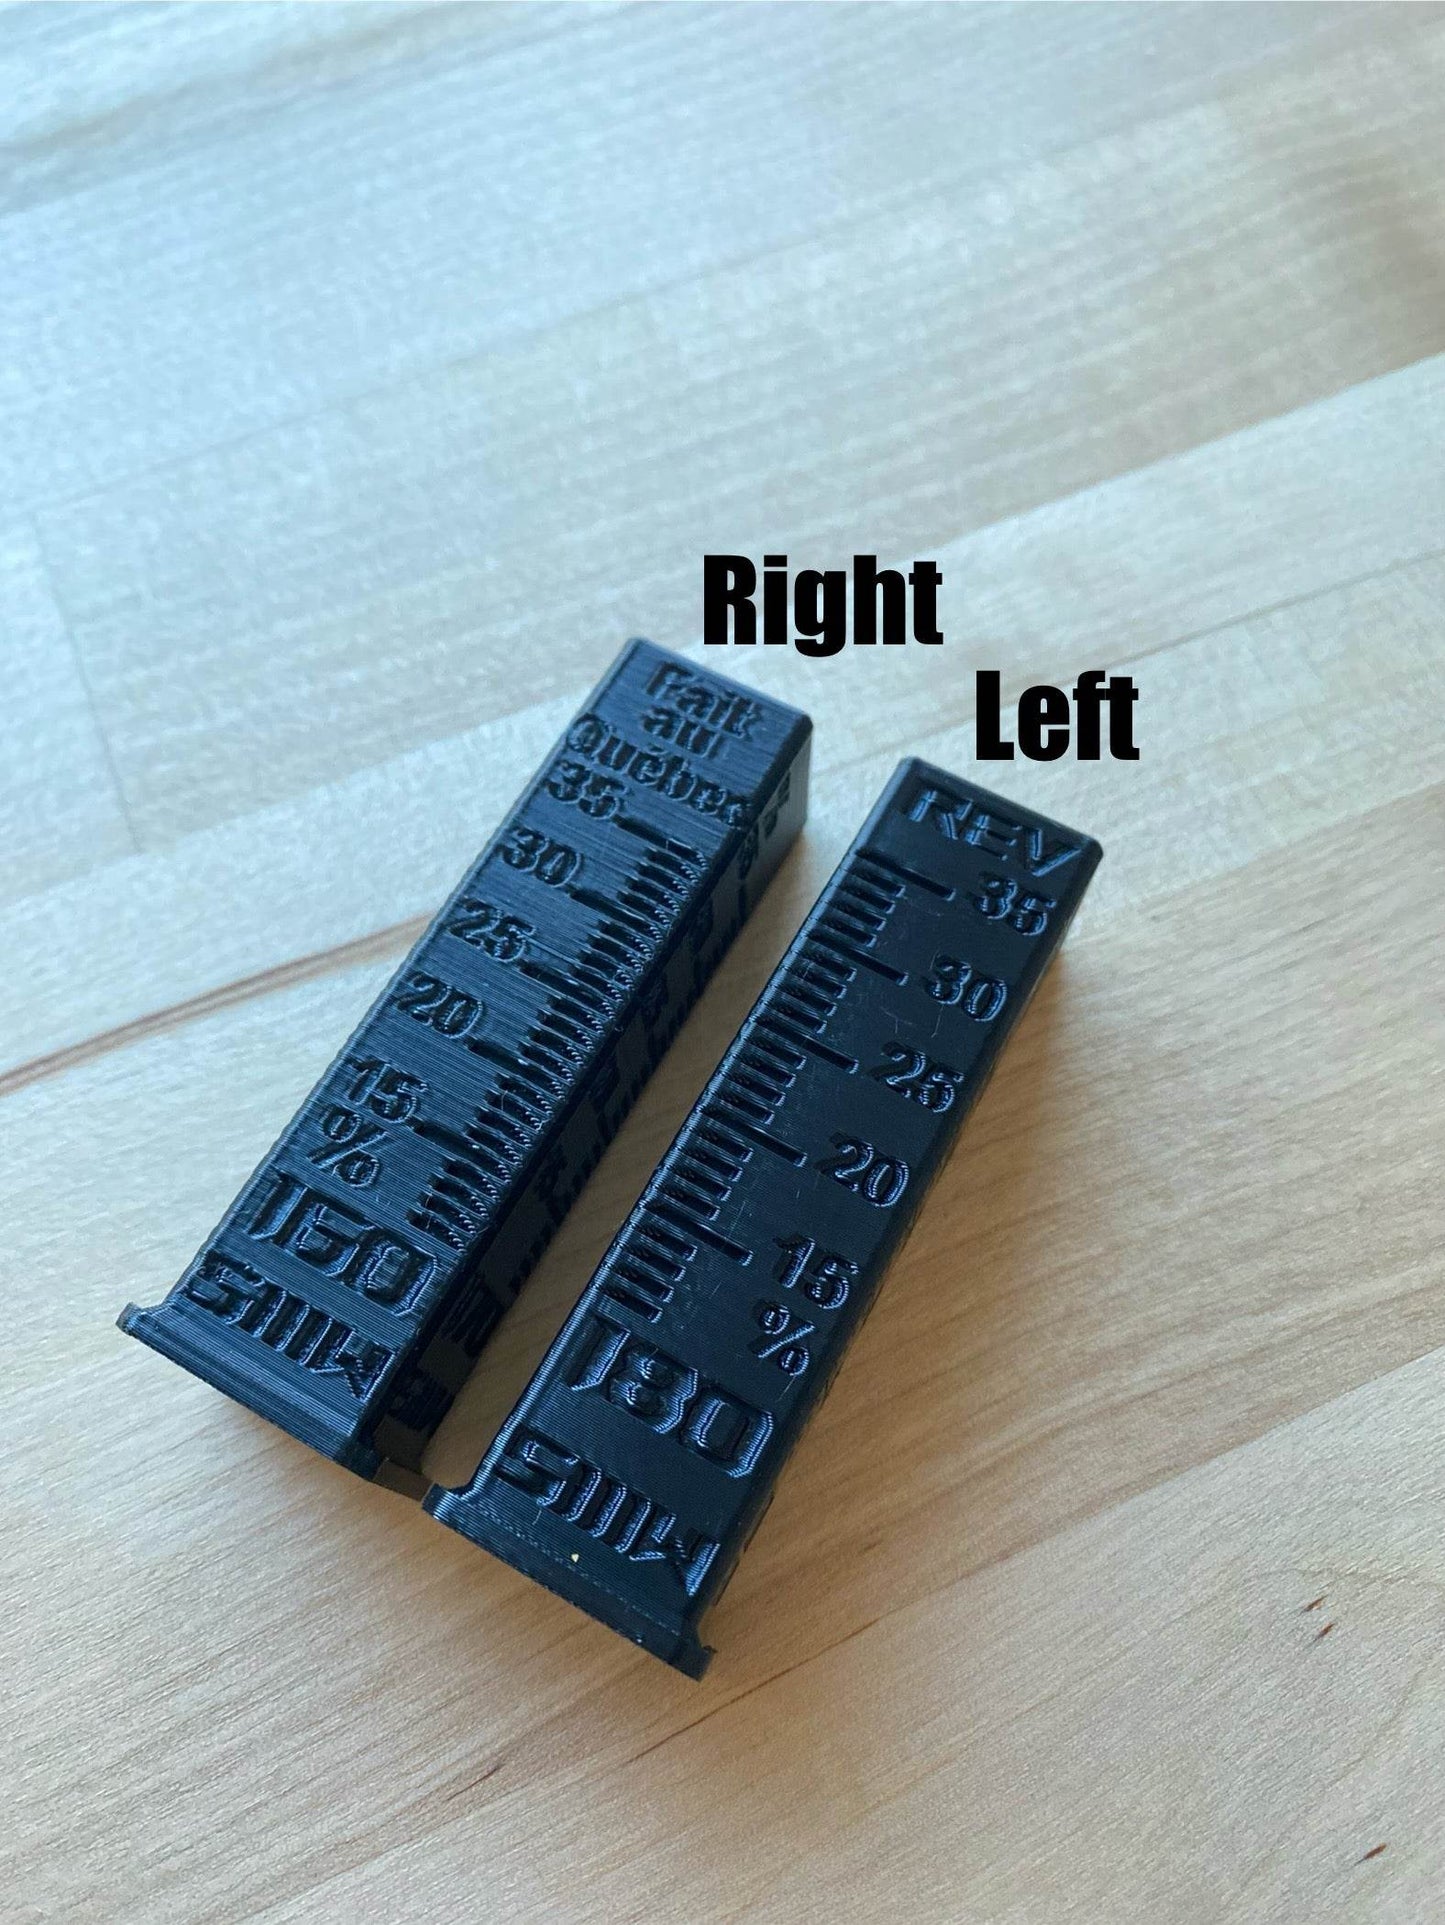
A four-sided measuring stick designed to help you dial in your sag for nearly any modern mountain bike fork. Available in Short, Medium, and Long Travel versions.

The lines are made to be used from the rear of the bike. I might make a side version later.

Option of Bioplastics at checkout
⚠️ Note: This tool is only for front forks. For air shock sag, see our Rear Shock SAG Tool. For coil shocks, the same tool works, but you’ll need our Finger Caliper to measure shaft sag between the coil. Not applicable to Rockshox Shocks and Forks because they have the Sag% on the shaft/Stanchion!

How It Works

  • Choose the tool version that matches your fork travel range:
    • Short Travel (120–150 mm): Shows 10-30% sag.
    • Medium Travel (150–180 mm): Shows 10-35% sag.
    • Long Travel (170–200 mm): Shows 12-35% sag.
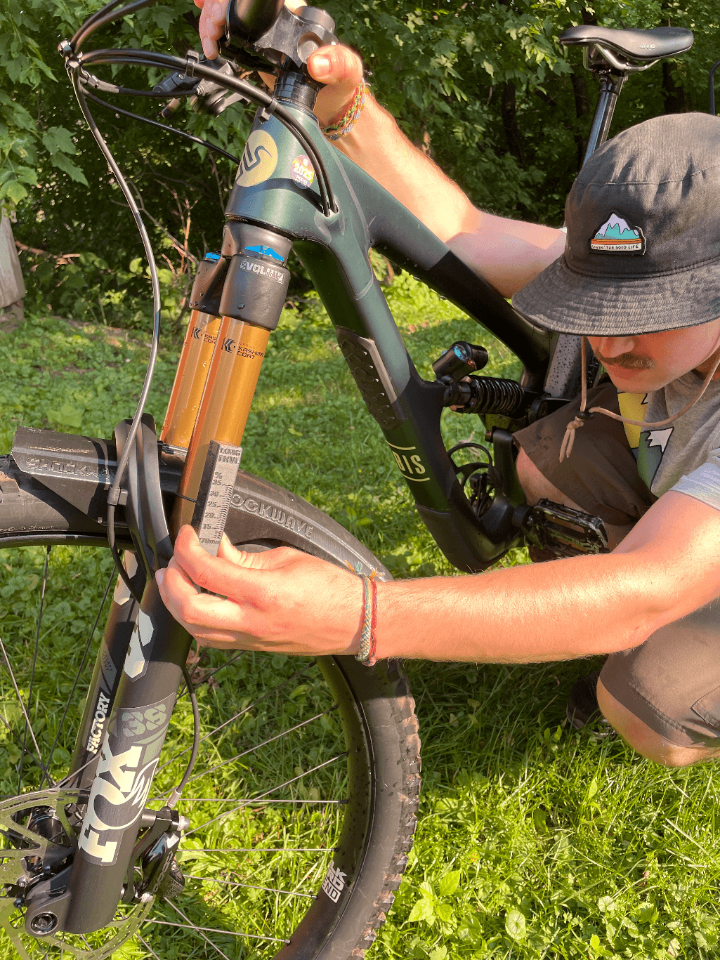
  • Sit the lip of the tool onto the dust wiper with the sag ring between the fork and the tool and measure the sag.
  • Each side shows a different travel and corresponding sag lines for quick setup.
  • Always measure at the bottom of the SAG ring, not in the middle or on top.
PLA
 More eco-friendly
 Nice Matte finish
 Super Clearer print details
Great for detailed, decorative pieces.
PETG
 Stronger & more heat-resistant
 Slightly shinier surface
 Less crisp detail than PLA
Great for functional or outdoor use.

Rider Setup Tips

  • Lower the sag ring to the dust wiper and get into your riding position, don’t just sit on the saddle, it puts all the weight in the rear.
  • Compress the fork slightly to break static friction, then return to neutral.
  • Measure where the sag ring sits against the tool and adjust pressure accordingly.

Watch a great walkthrough from Vorsprung at 5:20 in this video.

Sag Philosophy & Real-World Advice

Most riders aim for 20-25% fork sag on enduro bikes and 15–20% on short travel bikes, that’s a great starting point. But sag isn’t just about bottom-out control. It’s about balance, traction, and how your front wheel interacts with the trail.

Running more sag (e.g., 25% or more) can help the wheel track better in chunky terrain, especially if your fork has strong compression damping. DH pros often run low static sag but experience deep dynamic sag during riding. That improves traction, but reduces pop and support, so your bike may feel less playful.

On the flip side, too little sag gives you responsiveness and a snappy feel, but at the cost of grip and small-bump comfort. Find your balance, based on what terrain you ride and how your bike behaves under pressure.

Also, biking is supposed to be fun right? The most effective racing setup might not be the most fun setup.

 Rider Tip: It's Not Always the Suspension

Don’t underestimate the role of body position. If your bike feels harsh or unsettled, it might be a technique issue, not a sag issue.

If you’re not putting enough weight on the handlebar, your fork may not have enough negative travel available to fill the gaps between bumps and rocks. This leads to every hit transferring directly into your arms, resulting in arm pump and harshness. The fork needs a certain force to start moving, and without enough dynamic sag, it simply won’t activate fast enough.

This is especially true in downhill riding, where the front wheel needs to stay planted to track the terrain. If the fork doesn’t stay engaged, it can’t absorb hits properly.

 More weight on the front wheel + good compression damping = smoother ride and less arm pump.

I had this exact problem before. I wasn’t putting enough weight on the fork and wasn’t adopting a proper attack position. I kept thinking my fork was way too harsh, so I softened it, less air, less compression. But then I was bottoming out constantly on jumps, and the fork still felt rough in rock gardens. It made no sense.

A good rider eventually showed me how wrong my posture was. Once I learned to have the good hinged attack position and put pressure on the bars, everything changed. I actually added more air and more compression damping, and the fork felt way better. It tracked better, absorbed impacts, and no more arm pump.

If you're struggling with front suspension feel, seriously, check your technique. It might not be your fork. It might be you.

Recommended videos on body position:
The best body position for MTB
The Hinge position

Material & Warnings

  • Stronger Plastic is very strong but not bio, can be in your car, in water, anywhere.
  • 99%+ bio-based (Corn) polymer for that tool PLA version
  • PLA is not as heat-resistant or tough as other plastics, don’t leave it in your car on a hot day
  • Don’t step on it. It’s precise and functional, but not indestructible
Looking to measure rear shock sag?
Disclaimer: This is a reference tool. Always verify with your fork manufacturer’s recommendations and use your own judgment for tuning. It’s a setup guide, not a rulebook.
View full details