1
/
of
4
Shockwave Parts
FOX DHX 3.0 / 4.0 / 5.0 Full DIY Rebuild Tool Kit
FOX DHX 3.0 / 4.0 / 5.0 Full DIY Rebuild Tool Kit
Regular price
$55.00 CAD
Regular price
Sale price
$55.00 CAD
Shipping calculated at checkout.
Quantity
Couldn't load pickup availability
FOX DHX 3.0 / 4.0 / 5.0 Full DIY Rebuild Tool Kit
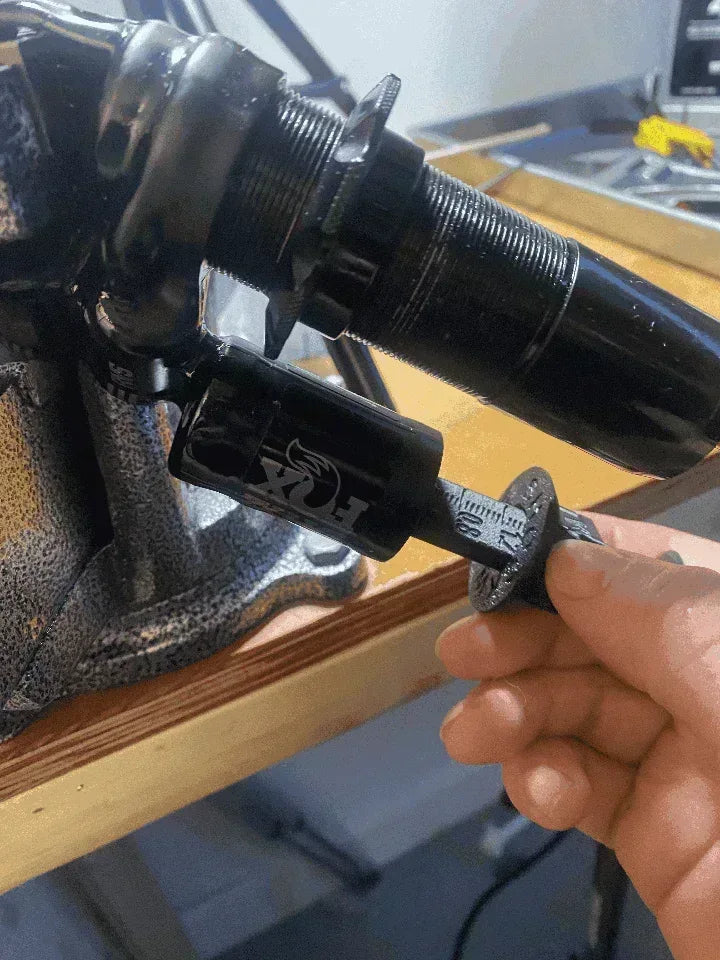
Full-service rebuild toolkit for classic FOX DHX 3.0 / 4.0 / 5.0 coil shocks. Covers the tools needed to service dynamic seals, reset IFP depth, and restore proper function even when official manuals are hard to find. (Bomber CR shares the same piggyback + damper tube diameters and is commonly shown in photos.)
What it does
- Enables a proper DHX 3/4/5 rebuild at home (oil + seals + IFP).
- Provides correct clamping and measuring tools for repeatable results.
- Lets you service what matters most on these shocks: dynamic seals + IFP sealing.
Required tools & parts (NOT included)
- Schrader valve core tool (mandatory; replacing the core during service is smart).
- Essential non-printable tools: Essential Tools
- Seal kit (never included): MTB Hydraulics DHX 3/4/5 seal kit
Tip: A Knipex pliers wrench works extremely well to open sealheads. Standard adjustables can work, but the risk of slipping/rounding is higher.
What’s included (and optional)
- DHX Shaft Clamp (1/2" + 5/8") : works for DHX 3/4/5 and also RC2/RC4 variants.
- Damper Body + Reservoir Clamp : optional, only needed if the body/piggyback is actively leaking.
- IFP Depth Tool (Graduated) : for precise IFP depth reset.
Key settings (pressure + IFP depth chart)
- IFP pressure: fill to at least 125 psi (recommended range: 125–150 psi).
- Most users only need: main shaft seal, wiper, dynamic seals, and the IFP seal.
- If your DHX 5.0 has a Boost Valve, leave it fully open during bleeding.
- Do not open the damper body or piggyback unless it’s leaking (often Loctited + cosmetic risk).
IFP Depth Chart
Metric
- 190 × 50 = 32 mm
- 200 × 50 = 32 mm
- 200 × 57 = 33 mm
- 215 × 64 = 34 mm
- 222 × 64 = 34 mm
- 241 × 76 = 38 mm
Imperial
- 7.500" × 2.00" = 1.25"
- 7.875" × 2.00" = 1.25"
- 7.875" × 2.25" = 1.30"
- 8.500" × 2.50" = 1.35"
- 8.750" × 2.50" = 1.35"
- 9.500" × 3.00" = 1.48"
Bleed & rebuild resources
Keep it simple: open adjusters, bleed cleanly, set IFP depth precisely with the depth tool. Rebound problems are often pressure/oil related, not broken parts.
You might also need
⚠️ Disclaimer
This kit is intended for experienced home mechanics. Incorrect disassembly, contamination, or opening non-leaking sealed parts can cause permanent damage. By purchasing, you agree to our Terms of Service.
Share