Shockwave Parts
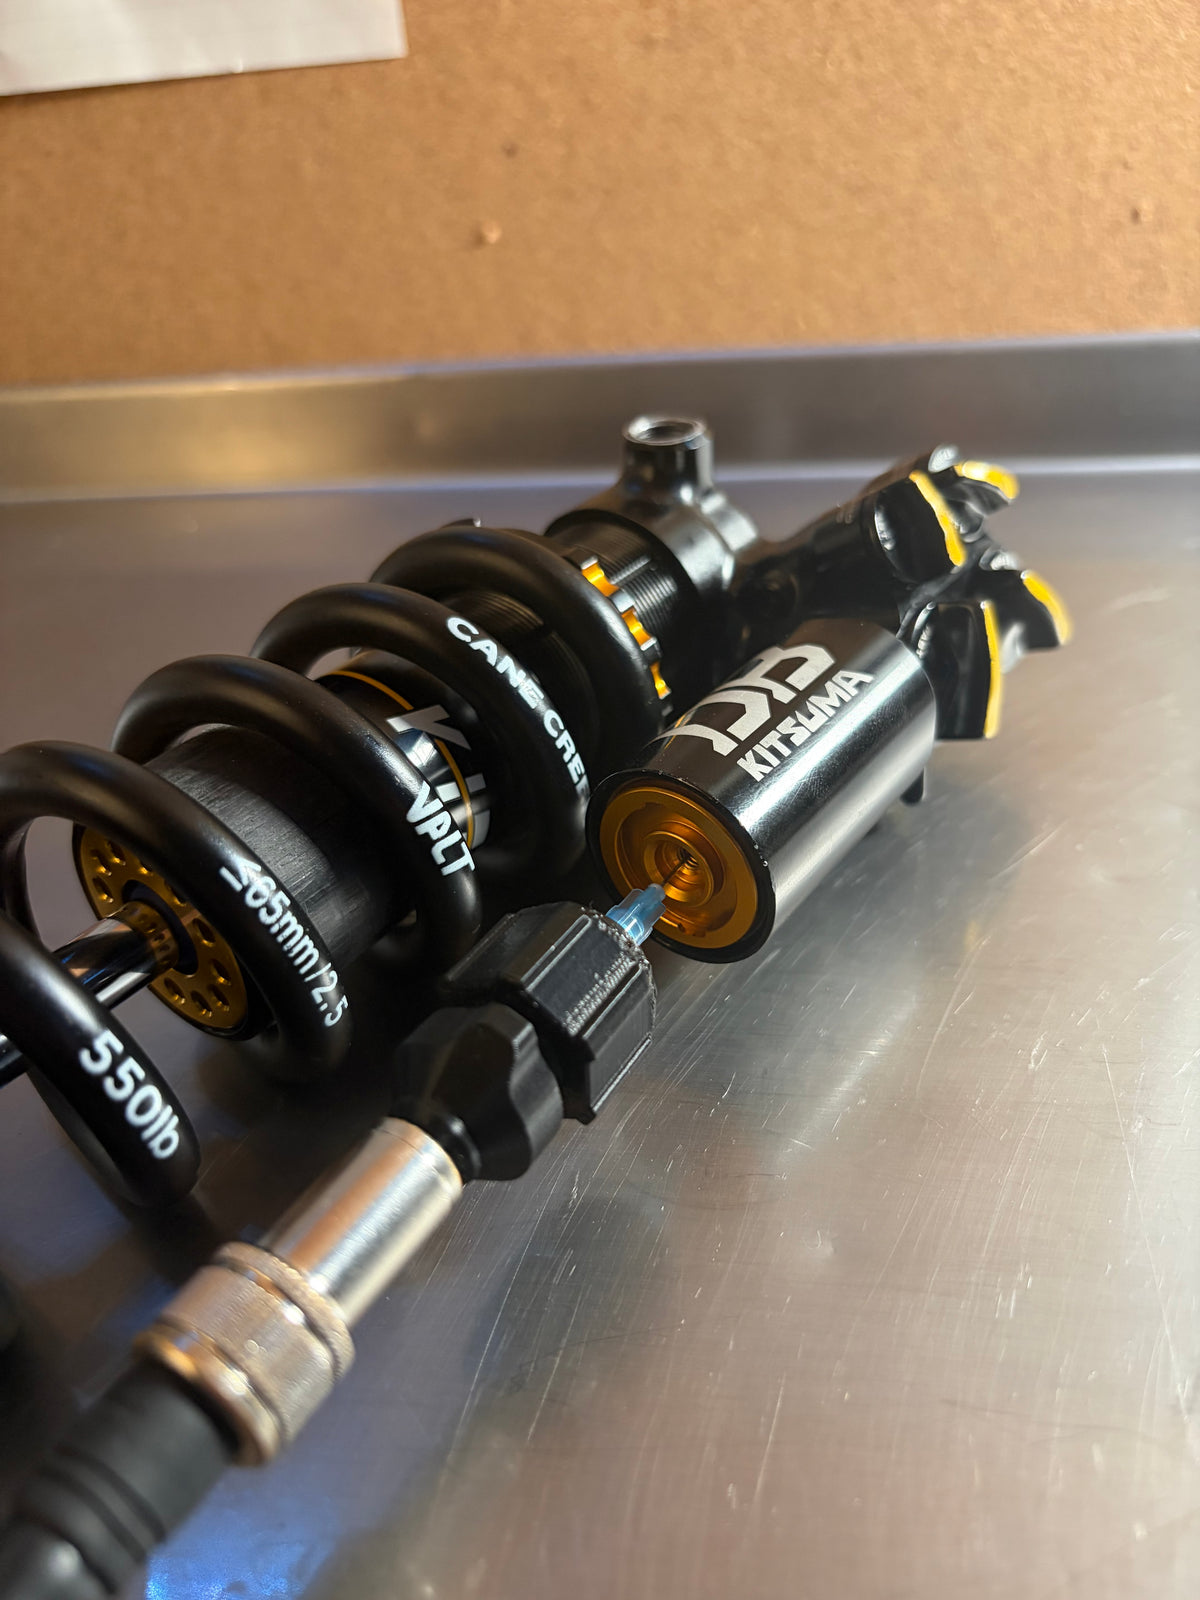
Digital STL (Print yourself) | Shock Pump Needle Adapter
Digital STL (Print yourself) | Shock Pump Needle Adapter
Couldn't load pickup availability
⚠️ Digital Product — No Physical Item Shipped
This product includes STL files only. You must print it yourself using a 3D printer. No physical product will be shipped.
The digital STL version of our lightweight needle fill tool for charging the IFP / bladder chamber through the rubber plug / pellet. This is the Home Mechanic (Lite) version, and it is 100% 3D printed, shock pump threads included.
It runs off the shock pump you already own. The same pump you use to set up your fork threads right onto this tool. No nitrogen tank, no regulator, no complicated setup: this is essentially a shock pump adapter for needle filling.
⚠️ Print settings are critical — read them before you print
This is a pressure tool. It only holds pressure if it is printed in PETG, with 15 walls, exactly as described in the Print Specifications section. The usual "4–5 walls with 100% infill" approach will leak.
⚠️ Releasing pressure? Disconnect the shock pump first
The tool has no Schrader valve core, on purpose, so it never traps pressure.
Filling is simple: the pressure climbs gradually and you control it. Going into a chamber that already holds pressure is the one case to watch. With the pump disconnected, that pressure vents harmlessly out the open end. With the pump attached it has nowhere to go, and the tool can see the full chamber pressure at once, past its rating.
So release pressure with the pump disconnected, or with a bare needle. And never connect the tool to a chamber above its rating.
Two sealing versions included: press-fit or O-ring
The STL pack gives you two versions of the adapter to play with. Print one or both.
Press-fit version: no O-ring at all. It seals with a press fit, so there is nothing extra to buy.
O-ring version: designed for a standard -007 O-ring (3.68 mm ID x 1.78 mm). They are very cheap, and there is a good chance you already have a few in your parts bin.
Only the Home Mechanic (Lite) version is available as an STL. The Deluxe version, with stainless steel shock pump threads, is sold as a physical tool only.
Print specifications — very important
- Material: PETG only
- Walls: 15 (this makes the part fully solid)
- Infill: none needed, the 15 walls fill the whole part
- Layer height: 0.12 mm from 0 to 8 mm height (the shock pump threads), using a height range modifier. The rest can use your normal layer height.
- Orientation: print it standing on the Schrader face
- Brim: 10 mm wide, 0.1 mm brim-object gap
Why 15 walls and not 4–5 walls with 100% infill? Infill leaves tiny voids and paths between the walls and the infill. Under pressure, air finds those paths and the part leaks. With 15 walls, the part is 100% solid with no voids and no way for the air to get through. With this technique, the printed part holds high pressure with almost no leaks. As far as we know, nobody had done this before.
Why PETG only? PETG is the only material that keeps good dimensional accuracy while also giving very strong layer bonding. Other materials can rip open along the layers under pressure. Do not print this in anything other than PETG.
Why 0.12 mm on the threads? Fine layers are what give the shock pump threads their accuracy and strength. You can print the whole part at 0.12 mm if you want, it just takes a lot longer.
What's included
- Adapter STL, press-fit version (no O-ring)
- Adapter STL, O-ring version (-007 O-ring)
- Compression nut STL
- 3 STL files total. No physical item is shipped.
Not included: needles, the -007 O-ring, and the shock pump. See the needles section below for what to look for.
Compatible with
- FOX
- Vorsprung
- Öhlins
- X-Fusion
- Cane Creek
- Most other shocks with a rubber plug / pellet in the IFP or bladder chamber
Connects to any shock pump or filling tool with a standard Schrader thread, including the regular shock pump you already use for your fork. No nitrogen setup required.
Uses standard Luer slip 23 gauge hypodermic needles. Not Luer lock.
Pressure rating
The Home Mechanic (Lite) version is rated to a maximum of 200 PSI, when printed exactly to the specifications above.
Our own prints were pressure-vessel tested at 300 PSI, with 20 pressure tests per fitting. Your print is only as good as your printer, your filament and your settings, so if you change anything from the specs, that rating no longer applies.
Most suspension shocks run at around 200 PSI or less, which is what this tool is built around.
Never exceed 200 PSI. Do not use this tool on high-pressure inline shocks running 500 PSI. For pressures that high, use a professionally rated tool designed for them.
Light enough that the needle stays straight
Heavy metal tools with long proprietary needles bend the needle just about every time. This one is short and fully printed, so there is barely any weight hanging off the needle and it stays straight while you work. It makes the whole job a lot easier.
The printed threads should get you through 10+ rebuilds easily. On a tester, the fitting was threaded and unthreaded 20+ times and still worked fine. How you store and handle the tool matters more than the number of rebuilds you do with it. And if the threads ever wear out, just print a new one.
The fittings are large and robust, so you do not need to crank down on the connections. Tighten the needle a little, and the same for the shock pump connection.
Needles you'll need
The tool uses standard 23 gauge Luer slip hypodermic needles. It does not use Luer lock needles.
Go with the 25 mm (1 inch) length. It is the shorter of the two common sizes, and the short length is what keeps the needle stiff. 35 mm needles are also out there, but they are a bit long for this and bend more easily.
Because these are standardized medical needles, they are cheap and easy to find in most countries. Compare that to the proprietary needles on some metal tools, which run around $20 for two and cannot be swapped for medical needles.
Here is an example of needles that work: 23 gauge, 25 mm needles on Amazon Canada.
Because the needle is a consumable, you can swap in a fresh one whenever the tip dulls.
How to use
- Fit a fresh needle, tightening it only a little
- Thread the tool onto your shock pump or filling tool
- Insert the needle into the centre of the pellet while rotating it gently, never forcing it
- Inflate quickly to just past your target pressure, staying under 200 PSI
- Pull the needle out as the gauge comes back through your target, then immediately snug the pellet
- Cycle the shaft to confirm it returns smoothly
Pump quickly. The gauge will creep down slowly while the needle is in. Go a bit past the pressure you want and pull the needle as the gauge comes back through your target. Trying to sit exactly on the number and then pull is what makes it fiddly.
Do not overtighten the needle. A little is enough for a good seal. If you crank it down hard, the male slip fitting can deform slightly. If you see a leak, snug it a bit more, but you should never need much.
Never bend the needle. Rotating gently on the way in is what keeps the tip straight and the pellet undamaged.
New to needle filling? Read our full guide: How to pressurize or depressurize a damper using a needle fill tool. It covers depressurizing, pellet retainers, pellet torque, and why you don't actually need nitrogen.
How it's made
Making a fully 3D printed pressure tool was not simple. It took very precise tolerances, a lot of experimentation, and the 15-wall printing technique developed specifically to keep pressure from getting inside the printed part.
The result comes out of years of working on Shockwave parts and pushing at the limits of what 3D printing can actually hold. Now you can print it yourself.
STL files only (digital download)
This is a digital product. You are downloading the STL files only to print the tool yourself.
No physical product is shipped.
⚠️ Disclaimer
This tool is intended for riders performing damper service where the IFP or bladder chamber needs to be recharged.
200 PSI maximum. Print in PETG only, with 15 walls, exactly to the specifications above. Downloading, printing and using these files are at your own risk. Shockwave Parts is not responsible for damage, injury or failures caused by incorrect use, exceeding the rating, poor printer calibration, incorrect print settings or unsuitable materials.
To release pressure from a shock, do it with the shock pump disconnected, or with a bare needle on its own. Going into an already-pressurized chamber with the pump attached transfers the full chamber pressure into a closed tool instantly. The tool has no Schrader valve core so that pressure can vent instead of building up.
Needles are sharp and the chamber is pressurized. Wear eye protection and handle needles carefully. Dispose of used needles in a sharps container or through a pharmacy or drugstore needle disposal program. Options vary by location, and you should not assume a local bike shop accepts used needles unless they have confirmed that they do.
Home-mechanic tool only. Not designed for shop-level volume use. By downloading these files, you confirm that you've read, understood and agreed to the conditions above and to our Terms of Service.
Share