1
/
of
2
Shockwave Parts
RockShox Charger RC Damper Rebuild kit
RockShox Charger RC Damper Rebuild kit
Regular price
$29.00 CAD
Regular price
Sale price
$29.00 CAD
Shipping calculated at checkout.
Quantity
Couldn't load pickup availability
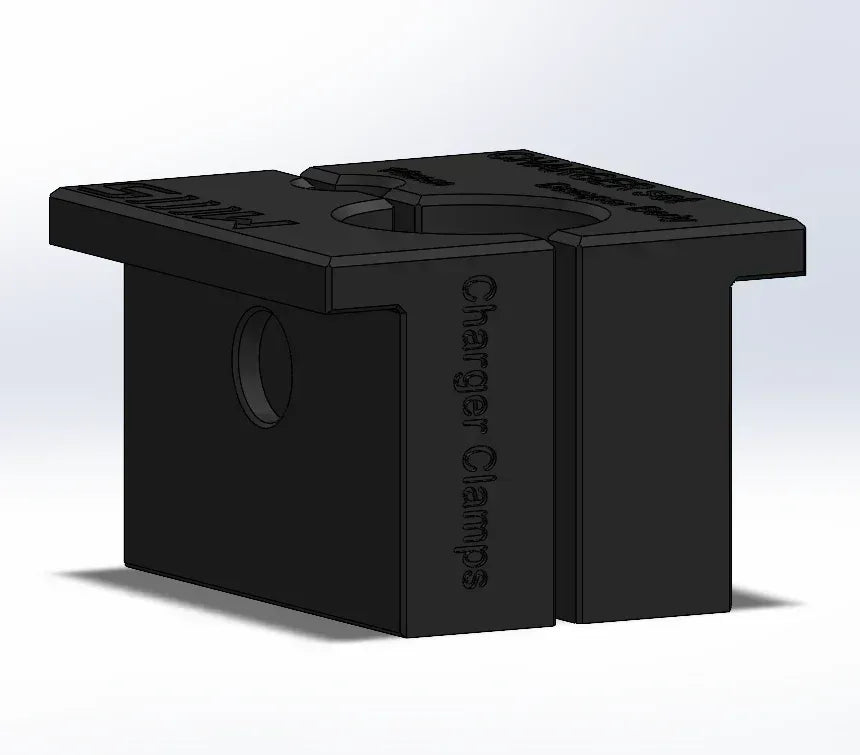
RockShox Charger RC Damper-Only DIY Rebuild Toolkit
The “RC” stands for Rebound–Compression. If your fork only has rebound (no compression knob), you probably have a Charger R, and the tools are the same.
Need Seals?
This listing includes all the tools you need to rebuild the RockShox Charger RC damper, the version with a sweeping compression knob labelled “Charger”. This is damper-only, not a full fork kit.
Clamping Tip
If your rebuild requires a large-diameter shaft clamp (20 mm+), double-check your technique.
How to Use a Big-Diameter Shaft ClampWhat's Included
- Charger Combo Clamp: fits both Charger RC and R damper profiles
Clamp into soft jaws, then follow normal bleeding procedure from the manual.
How to Bleed & Rebuild
Refer to the official RockShox guide:
Disclaimer
Always follow official procedures and torque specs. Use at your own risk.
See our Terms of Service.
Share