Shockwave Parts
Fox Fork Full Rebuild Tool Kit – Lower Legs + Air Shaft
Fox Fork Full Rebuild Tool Kit – Lower Legs + Air Shaft
Couldn't load pickup availability
Fox Forks Full Lower Leg + Air Shaft Rebuild
Full 50-hour service for Fox forks, including dust wiper replacement and a complete 200-hour air shaft rebuild (positive + negative seals).
Use Air Spring Seal kits, they are extremely cheap and ship by letter mail.
⚠️ Important Safety Warning
Always fully depressurize the air spring before removing the lowers. Air can remain trapped in the negative spring, deflate 15–20 psi at a time and pull gently on the lowers to equalize chambers. Do this before removing the wheel.
⚠️ Special Notes (Fox 38 NA2 + Fox 40)
Fox 38 NA2:
This fork uses a removable airspring assembly. Follow the official Fox guide: Fox NA2 Manual
Fox 40:
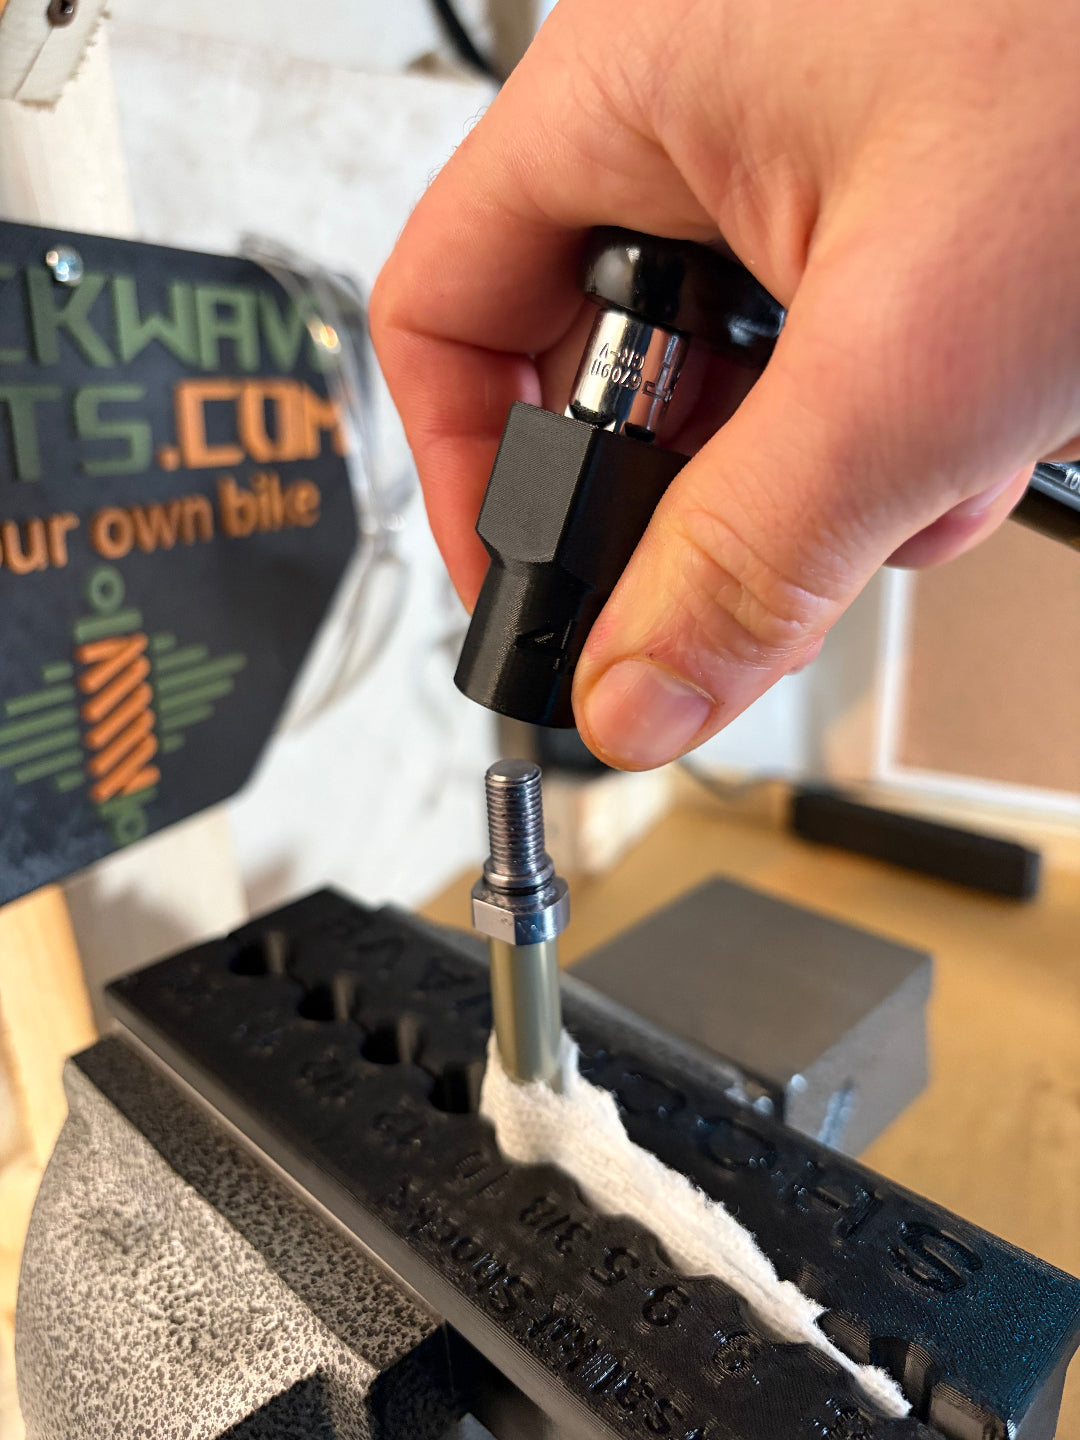
You need a SPA-1 Pin Spanner (3mm) to remove the air piston. SPA-2 (2.3mm) may also work. Pin wrenches are not included since they are inexpensive/common tools.
What You Need (Consumables + Tools)
- Fox 20wt Gold: air spring side (left leg)
- Fox 4wt Fluid: GRIP damper side (right leg)
- Slickoleum or SRAM Butter
- 60ml+ syringe with tubing (for oil volumes, see Fox chart)
- Soft mallet or block of wood
- 6-in-1 Top Cap Tool
- Heat source: torch, heat gun, or lighter (Loctite break)
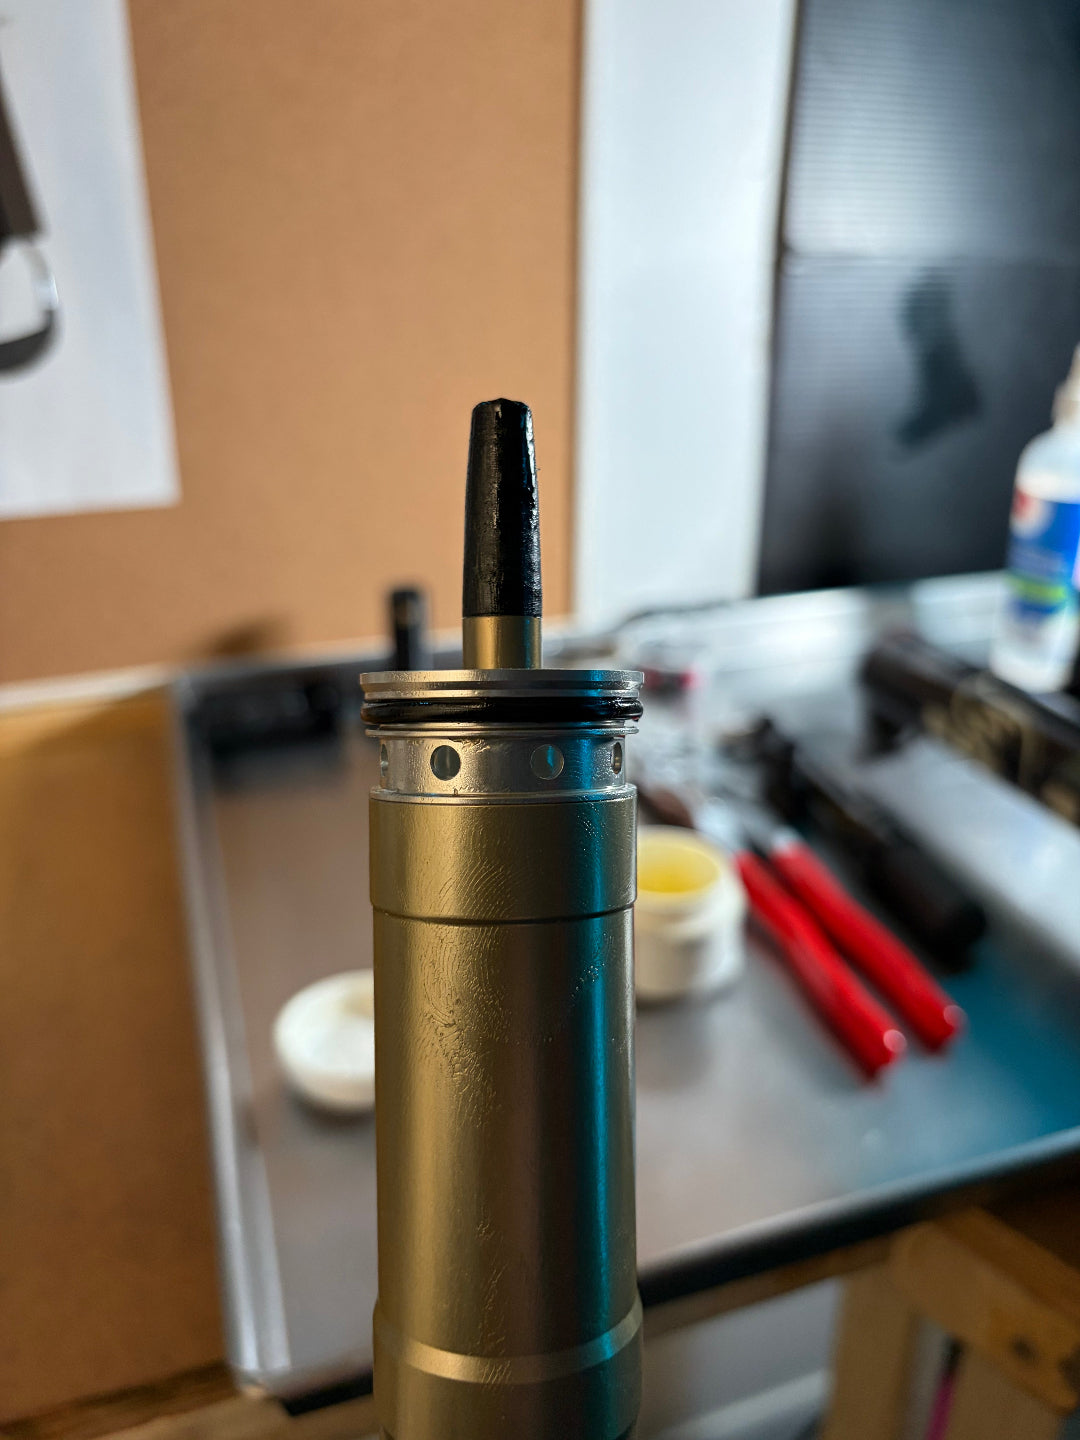
- Red Loctite: for air shaft tip
What’s Included in This Toolkit
- Dust Wiper Tool V2 (your selected size)
- Driver for lower-leg shafts
- 10mm Shaft Clamp for safe air-shaft clamping
- NA2 Bullet Tool (10mm Fox air shafts)
Oil Notes
– GRIP dampers ingest lower-leg oil → always 4wt on damper side
– 20wt Gold on air spring side
– Non-GRIP forks: 20wt Gold on both sides
– Soak foam rings in oil before reinstalling
– Add 3ml of oil into the positive air chamber of the air piston
Pro Tips
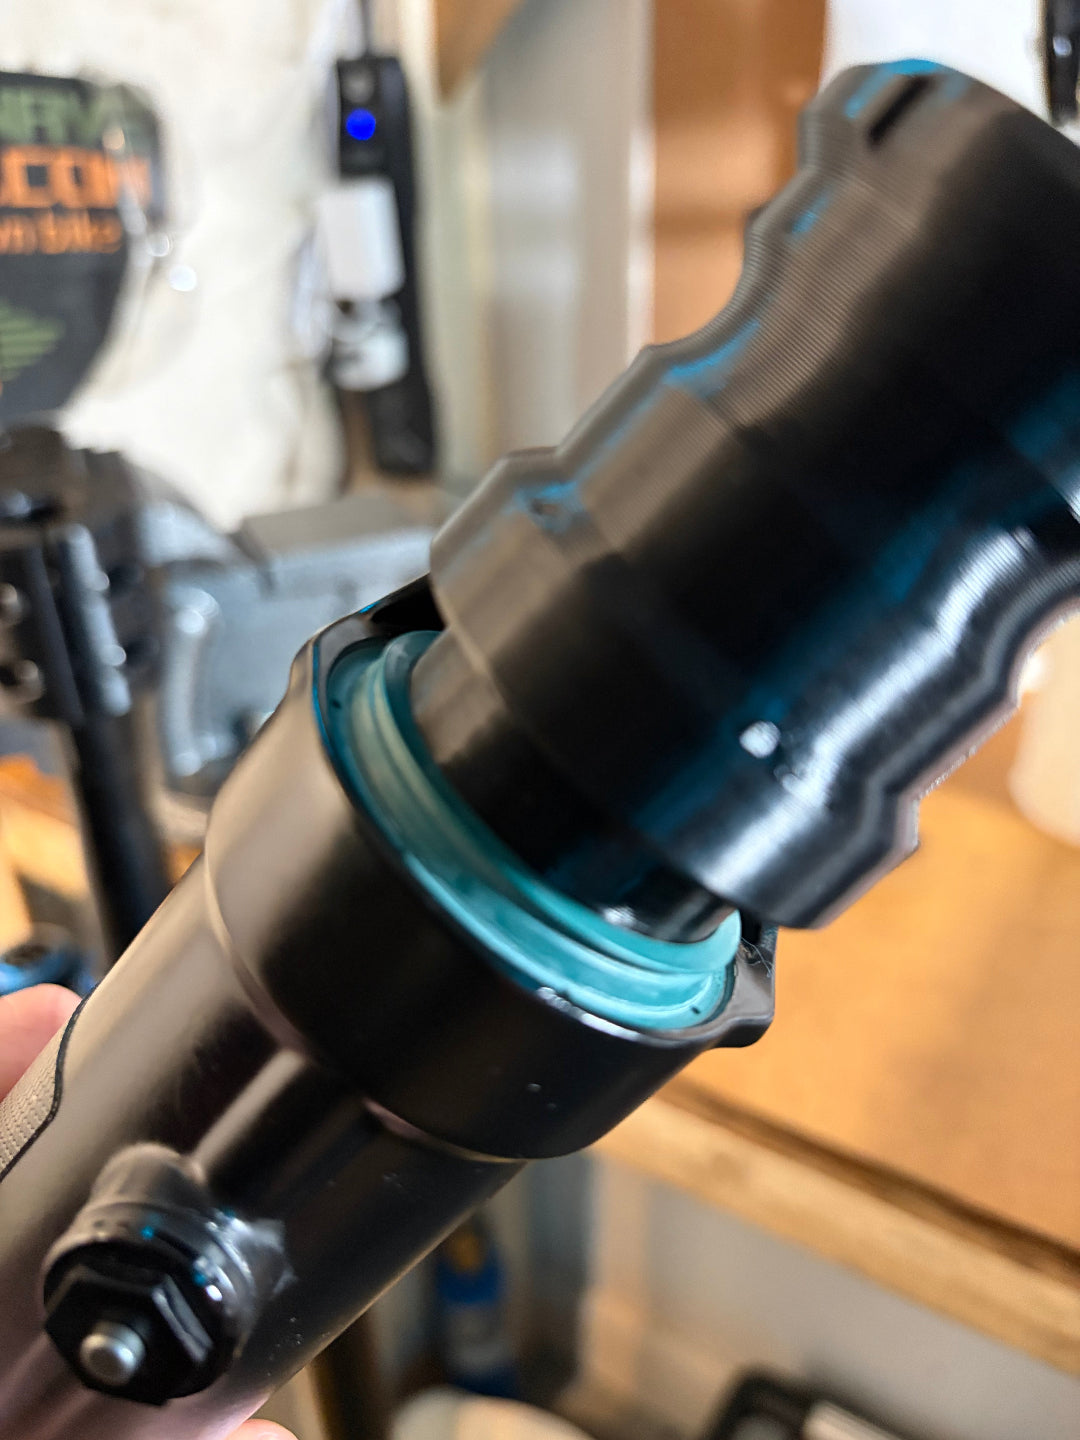
- Insert dust wipers slowly and straight, do not drive too deep
- Use a seal press with a center guide for perfect alignment
- Best removal tools: rounded/taped 32mm wrench (or 24mm)
- Never use anything sharp on the wipers
- Grease dust wipers + lower bushings generously with SRAM Butter
- Before reinstalling lowers, pressurize air spring to 10–15 psi to prevent vacuum
- Clamp air shaft 1–2cm under the tip, cleaned + wrapped with paper
- After removing air-shaft tip, slide out negative sealhead carefully
- Use NA2 bullet tool to reinstall sealhead smoothly (grease heavily)
- Don’t forget red Loctite when reinstalling the air-shaft tip
Disclaimer
This is a home mechanic guide. You are responsible for proper installation and safety. Always depressurize the fork completely before starting. See our Terms of Service.
Share