1
/
of
2
Shockwave Parts
Fox FIT Damper Rebuild Kit | All Years
Fox FIT Damper Rebuild Kit | All Years
Regular price
$39.49 CAD
Regular price
Sale price
$39.49 CAD
Shipping calculated at checkout.
Quantity
Couldn't load pickup availability
Fox FIT Damper All Years Rebuild Kit (8mm + 10mm Shaft)
For all Fox FIT-style dampers (FIT4, FIT RC2, etc.) damper-only rebuild. Includes shaft clamps for both 8mm and 10mm shafts. Use your Tune ID or serial number to identify the correct internals before buying any seal kits.
What’s Included
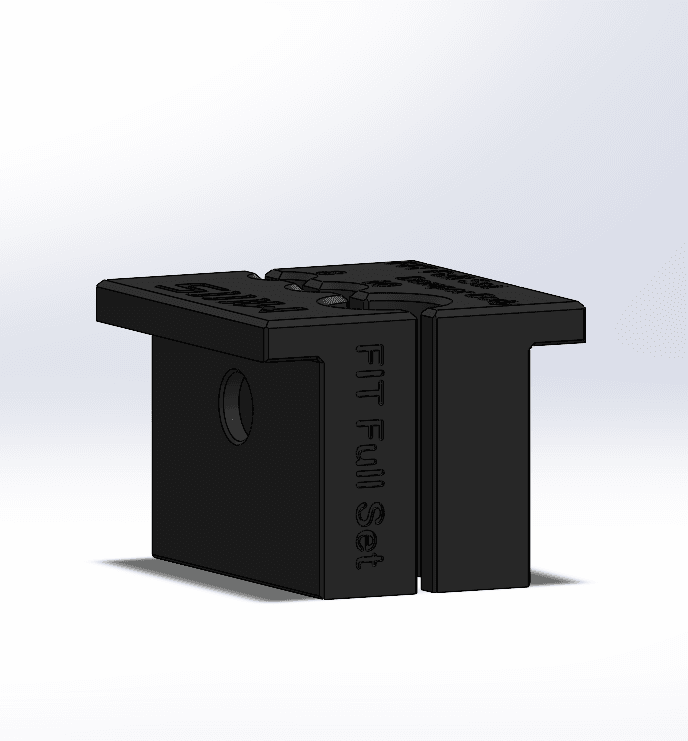
3-in-1 Shaft Clamp System:
- 8mm Shaft Clamp (damper shaft)
- 10mm Shaft Clamp (also fits air shafts)
- FIT Damper Body Clamp
This clamp combo covers all known Fox FIT damper variants across years.
You’ll need basic fork tools and a chamferless top cap socket (usually 26–28mm). See the Essential Tools Page.
The socket is very small on top of the damper.
DO NOT TRY TO OPEN IT WITH AN ADJUSTABLE WRENCH.
Seal Kit Information
Fox-branded sealhead kits cost more but include pre-assembled sealheads.
If you are unsure of your shaft size, open the damper and compare visually.
Reference Material
- Clamping Small Shafts
- Clamping Large Shafts
- Suspension Terms Explained
- Find the correct Fox manual using your serial number or 4-digit code. There are too many FIT4 variations to link individually.
⚠️ Warnings
- Always depressurize the air spring before removing the lowers (if applicable)
- Clean all clamp zones with isopropyl alcohol before clamping
- Clamp only in reinforced zones (never on threads or logos)
- Do not open the base valve unless needed (blown bladder or confirmed issue)
Pro Tips
- Opening the base valve is usually unnecessary.
- Most rebuilds only require sealhead service.
- If rebound works but compression is weak, suspect low oil or a bad bleed.
- If rebound leaks from the tip, the meter rod o-ring is likely damaged (common).
- The rebound meter rod has a tiny o-ring, easy to replace.
- Bladders often collapse slightly after the bleed. Normal behavior.
- Don’t stroke the damper after closing it unless the circlip is installed.
- Open all adjusters before bleeding.
- Optional upgrade: Vorsprung Fractive Kit
Rebuild + Bleed Procedure
- Clean damper thoroughly with isopropyl alcohol
- Clamp damper body with FIT body clamp and remove sealhead
- Extract shaft/piston assembly and drain oil
- Clean components with isopropyl alcohol
- Clamp rebound shaft (8mm or 10mm) and remove rebound assembly, heat may be required
Bleeding Process
- Turn LSC fully in
- Remove retaining ring of adjuster needle assembly (through the small side hole)
- Reopen LSC and rebound fully; set climb lever to OPEN
- Clamp damper upside down and fill halfway with the good oil
- Squeeze bladder gently to release trapped air
- Ensure adjuster needle is fully inserted or oil may leak
- Top off oil and reinsert shaft slowly to avoid air intake
- Tighten sealhead to 8.5 Nm
- Invert, remove needle assembly, and bleed through hole on the middle with a kitchen funnel or anything that fits
- Stroke shaft slowly while compressing bladder for 10–20 minutes
- If microbubbles persist, verify all adjusters are fully open
- Let damper rest if needed; bubbles eventually rise
- Reinstall needle assembly + retaining ring
Final Assembly
- Grease detent spring and ball
- Verify rebound and compression click properly
- Some FIT dampers do not self-extend outside the for, normal
- Reinstall damper using a 32mm chamferless socket
Share


